Custom Properties - Software Tracking
On this page, we'll learn how to track installed software from your clients' machines using Installer Analytics.
First, we'll need an Advanced Installer project. You can open your existing project or create a new one. You can always follow a tutorial like this one if you're new to Advanced Installer.
Second, we need to identify the app(s) that we want to track and locate it/them using searches; for this example, we're going to track 7-Zip x64
- We need to go to the 'Search' view and add a 'New Extended Search' that will check if a certain 'Registry value exists', naming it SEVEN_ZIP since properties cannot start with a digit
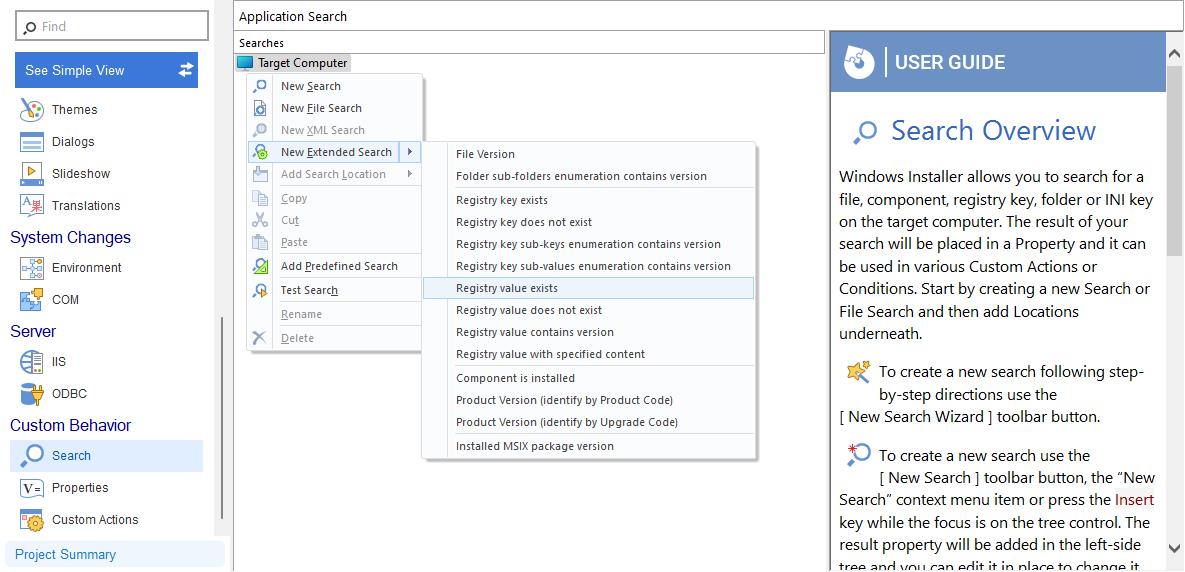
Search view with registry extended search - Now, we need to add the
HKCU\Software\7-Zip\Path64path in 'Registry value'; this is where 7-Zip stores its path after installation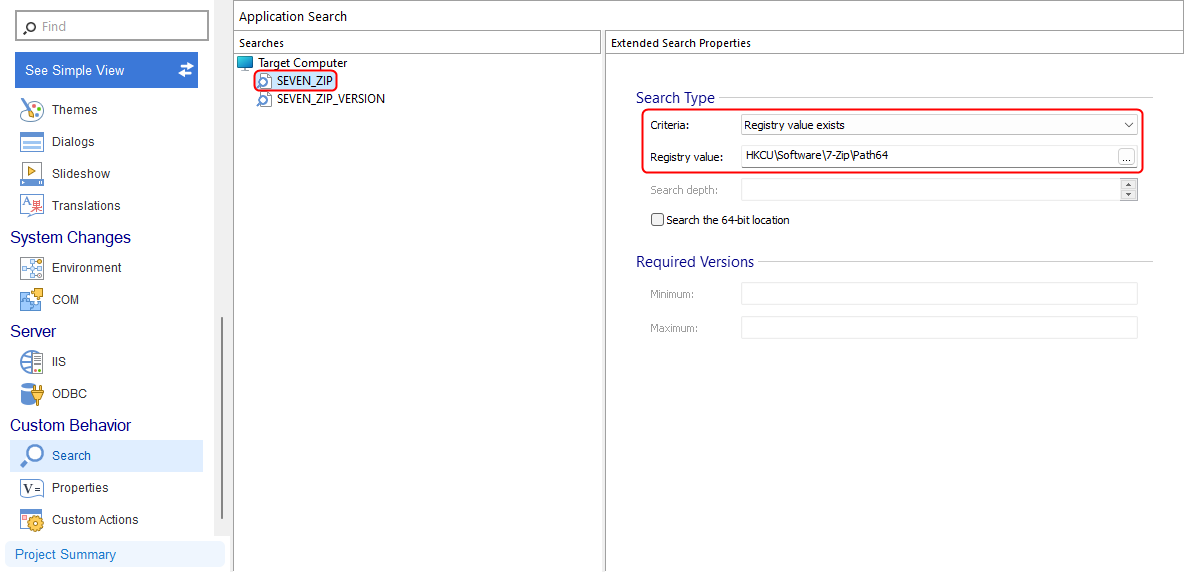
Search View with registry search - We need to add another 'New Extended Search', only this time it will check and retrieve the 'File Version', naming it SEVEN_ZIP_VERSION
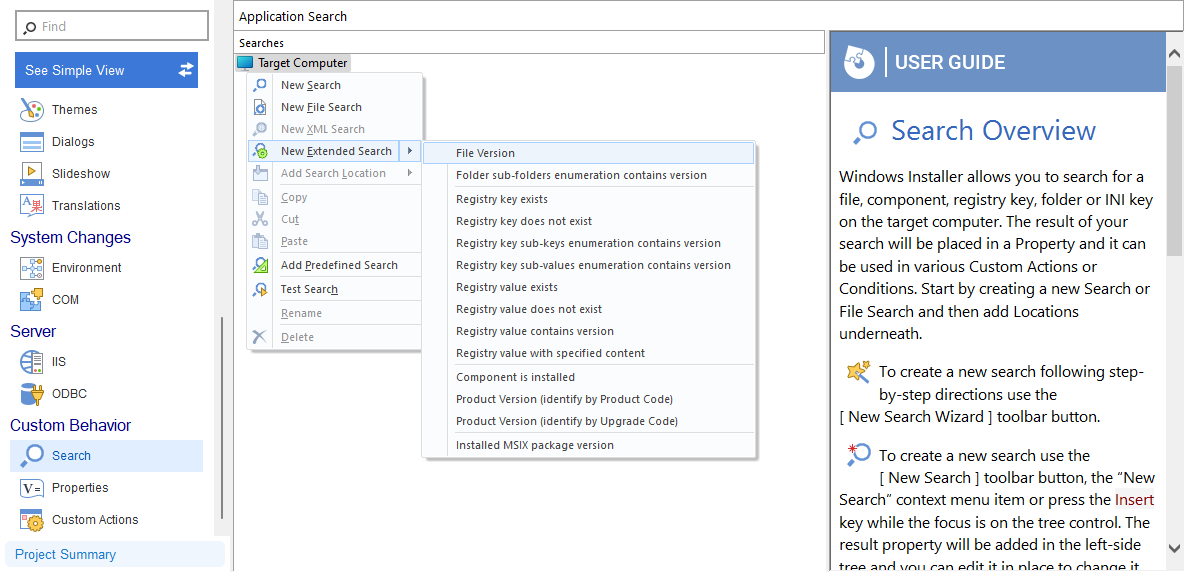
Search view with file version extended search - Now, we need to add the
[ProgramFiles64Folder]7-Zip\7zFM.exepath in 'File to find'; this is where 7-Zip stores its files by default after installation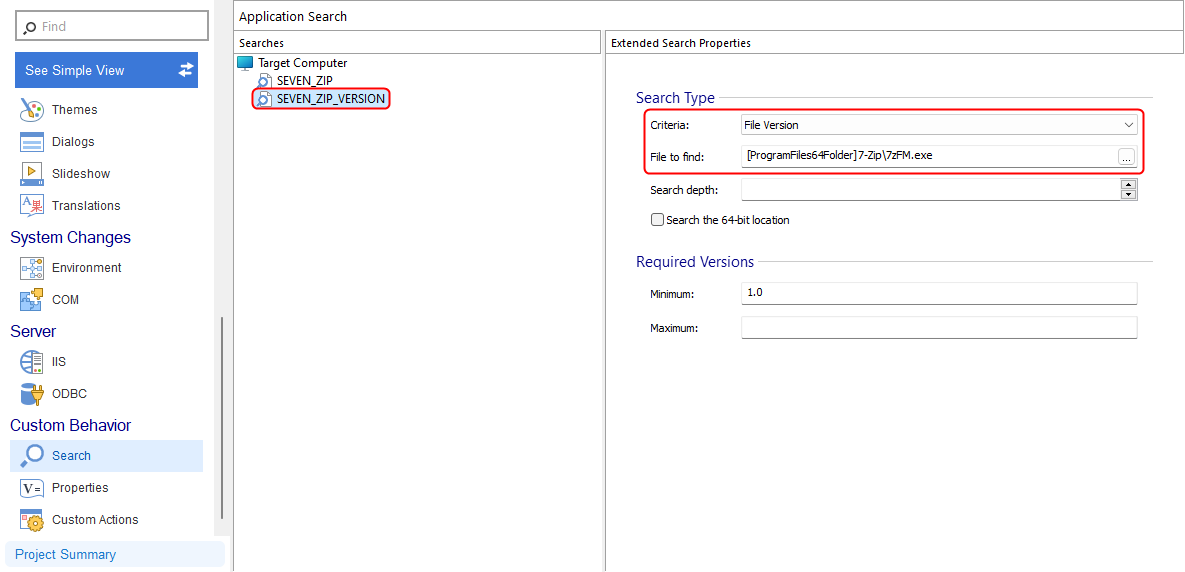
Search View with file version search
![]() Please note that this one will only work if your customer installs 7-Zip in its default location. Changing the path will make the version check fail.
Please note that this one will only work if your customer installs 7-Zip in its default location. Changing the path will make the version check fail.
Third, we'll need to enable the Installer Analytics tracking for that project. If you're unfamiliar with this step, you can follow this link to guide you step by step.
Fourth, and this is the most crucial part, we need to add the properties associated with the searches into the Installer Analytics view of our project. In our case, the properties are SEVEN_ZIP and SEVEN_ZIP_VERSION. To do so, we need to:
- Navigate to the Installer Analytics view from your Advanced Installer project
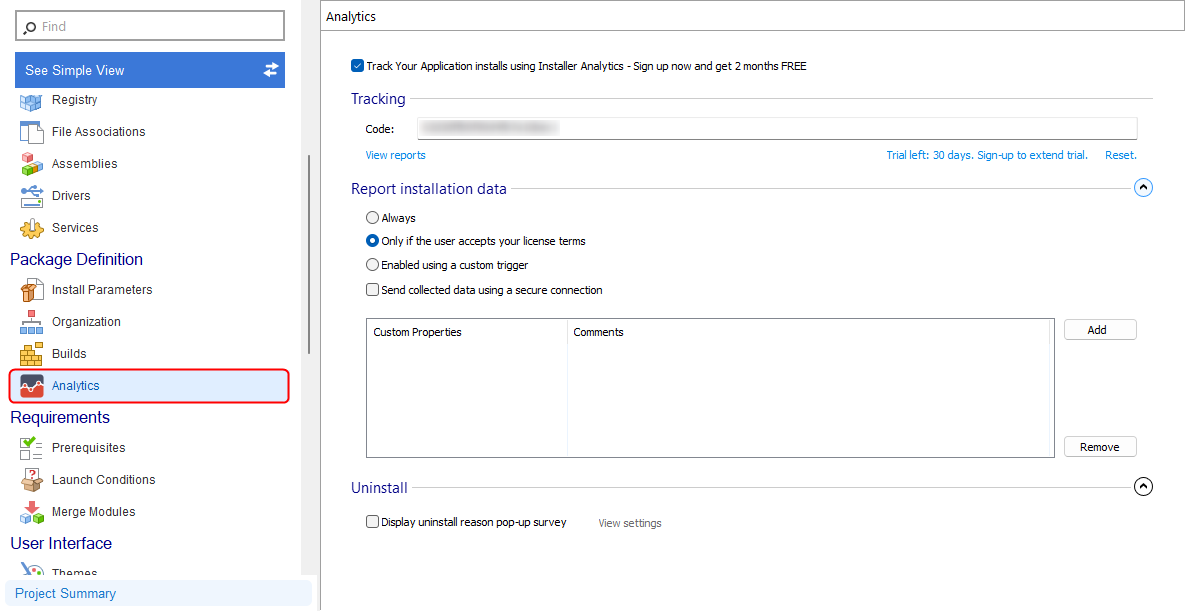
Installer Analytics View - In the 'Report Installation Data' section, you'll see the Custom Properties table

Custom Properties Table - Press 'Add' in order to open the 'Select a Property' picker
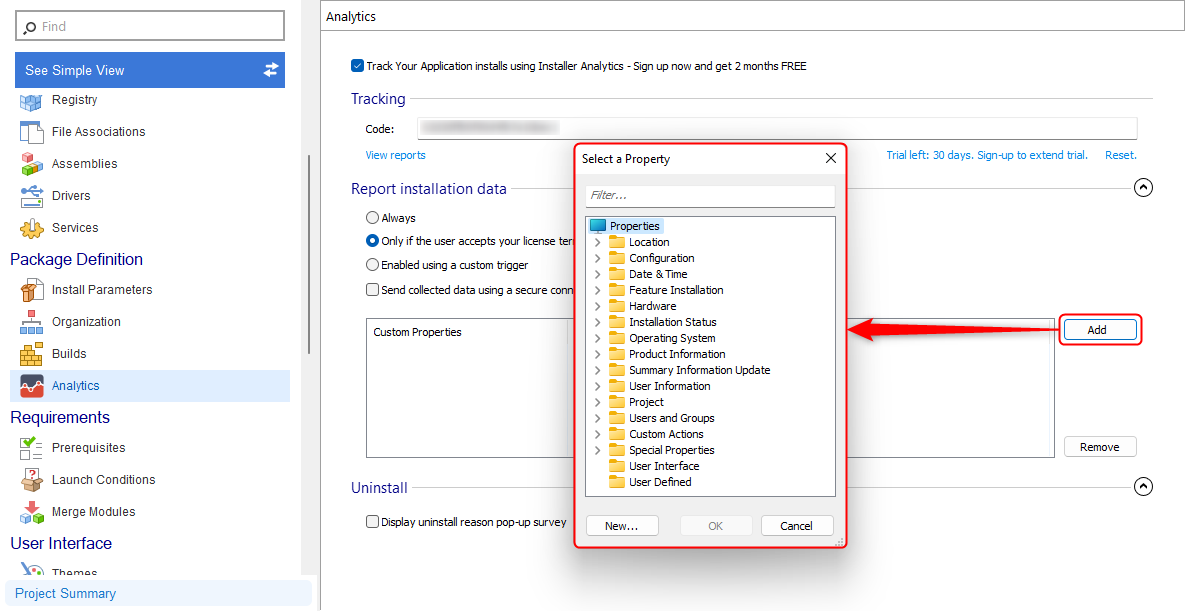
Select a Property picker - Enter 'SEVEN_ZIP' and press 'OK'
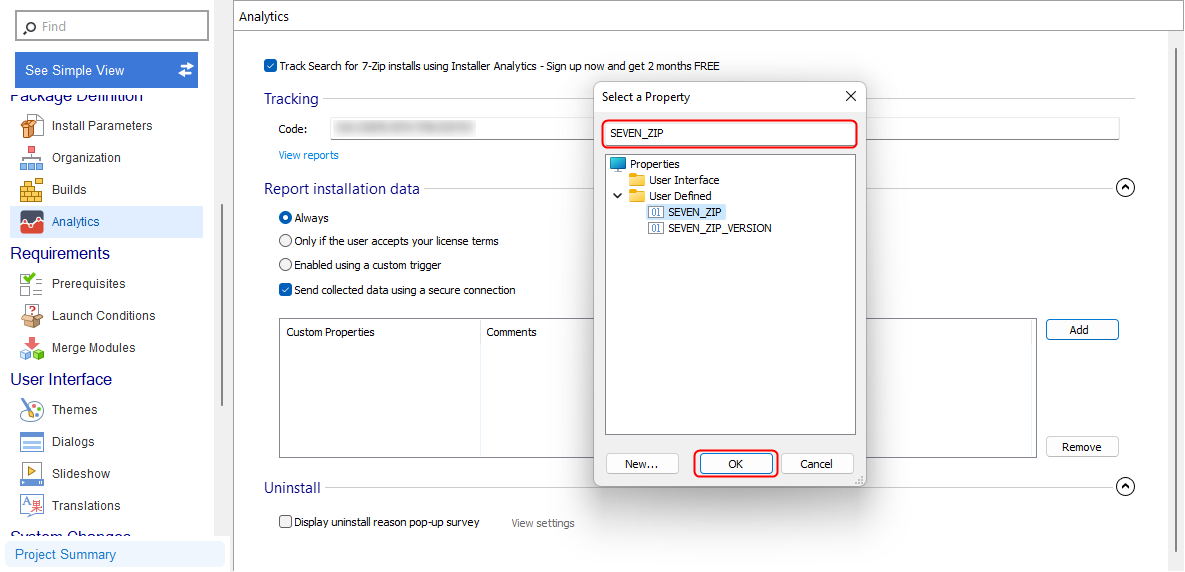
SEVEN_ZIP property - Enter 'SEVEN_ZIP_VERSION' and press 'OK'
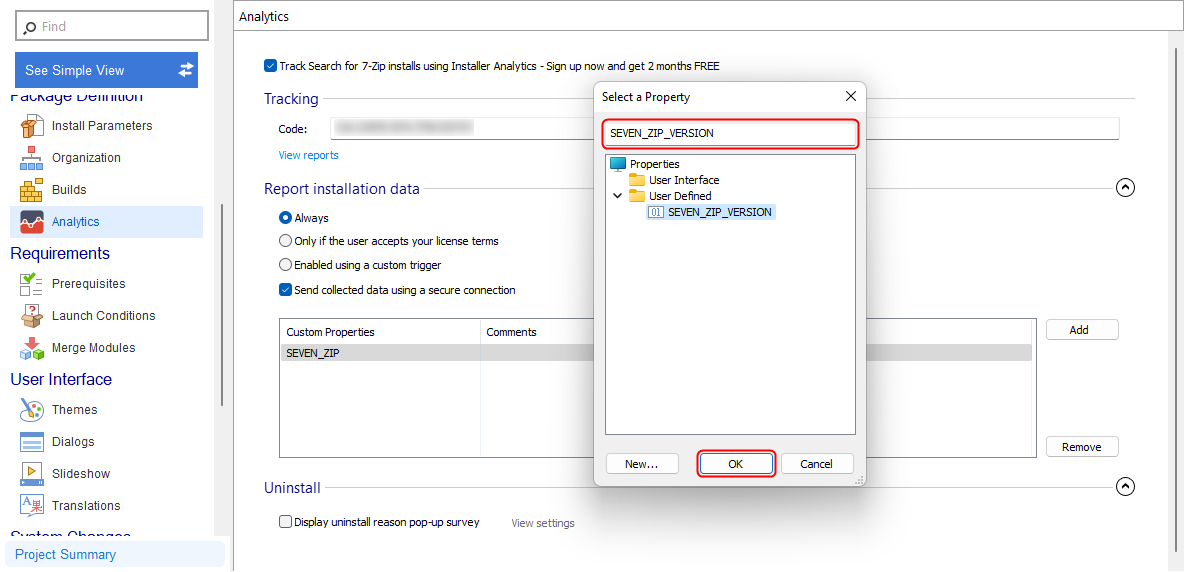
SEVEN_ZIP_VERSION property - It should look like this
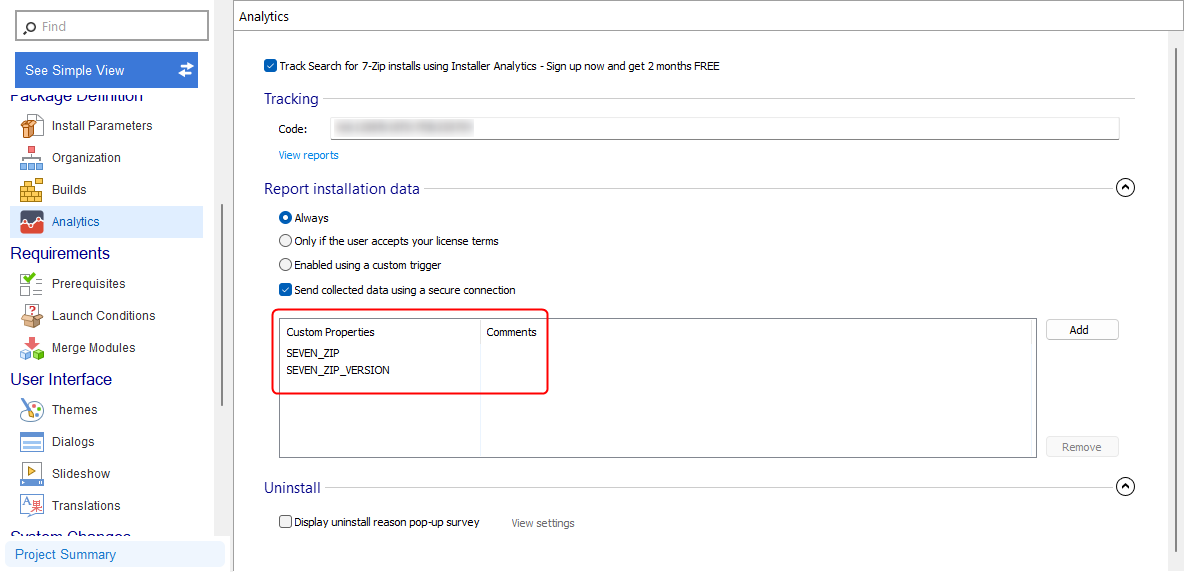
SEVEN_ZIP and SEVEN_ZIP_VERSION properties in AI
Fourth, we need to save, build the project, and finally release the installer to your customers. Once these have been done, your clients will start installing your product, and Installer Analytics WebApp will show the tracking data.
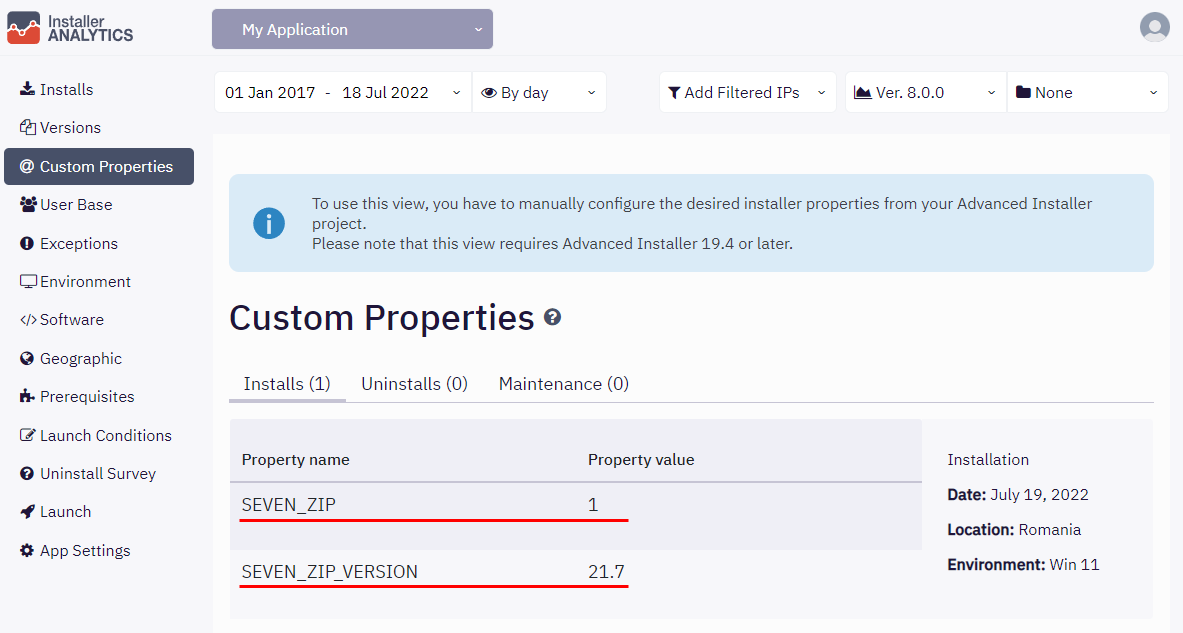
Note: You can also test the tracking yourself before releasing it to ensure that everything was configured correctly. If you plan to do so, please use the Only Filtered IPs option, as your IP might be already placed in the exclusion list from the App Settings view in the 'IP Filter' section.
![]() Please note that you can use the example above for any software. You can track it using the method above if you know how to identify its location.
Please note that you can use the example above for any software. You can track it using the method above if you know how to identify its location.