Custom Properties - Tracking the installed features individually (the harder way)
On this page, we will learn how to set up the tracking of the installed features, individually, using Installer Analytics. It's a bit harder to implement comparing to the previous method but will be a lot easier to filter and process the resulting data.
First, we'll need an Advanced Installer project. You can open your existing project or create a new one. You can always follow a tutorial like this one if you're new to Advanced Installer.
Second, we need to define our features. You can skip this step if you only have one feature. For this example, we'll be having three features:
- MainFeature
- SecondFeature
- ThirdFeature
To do so, we need to:
- Go to the 'Organization' view
- Press on 'New Feature' from the ribbon OR right-click anywhere in that view and press on 'New Feature'
- Rename the added feature and its Identifier according to your needs; for this example, we'll be using the values presented above
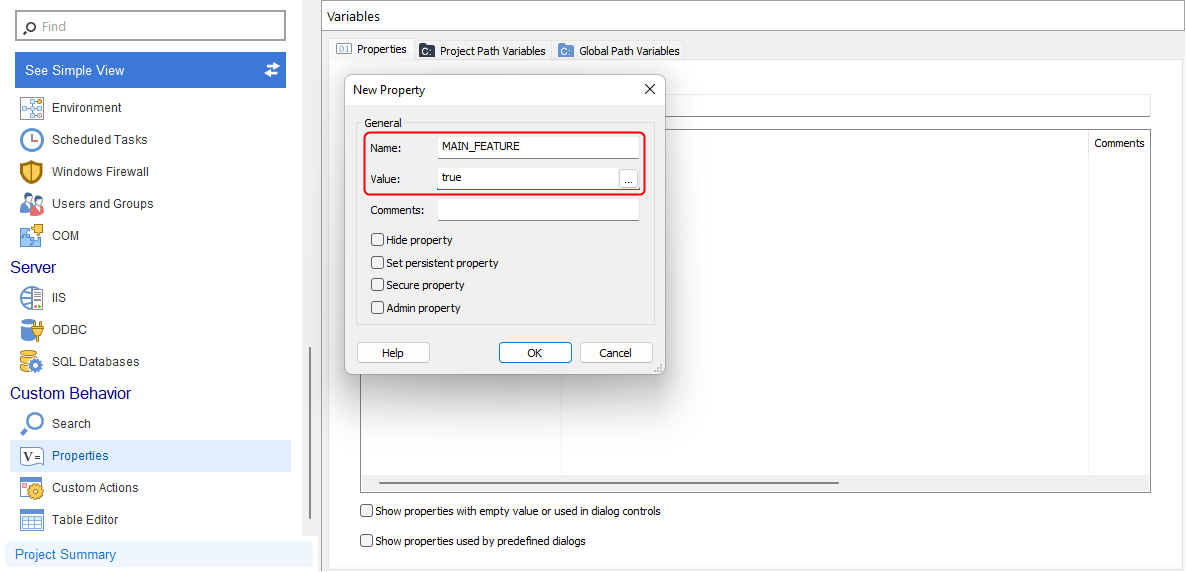
Third, we will define a property for each feature, one which will 'remember' the state of each feature (if it will be installed or not). To do so, we need to:
- Go to the Properties view
- Press on 'New Property' from the ribbon OR right-click on the table, then press on 'New Property'
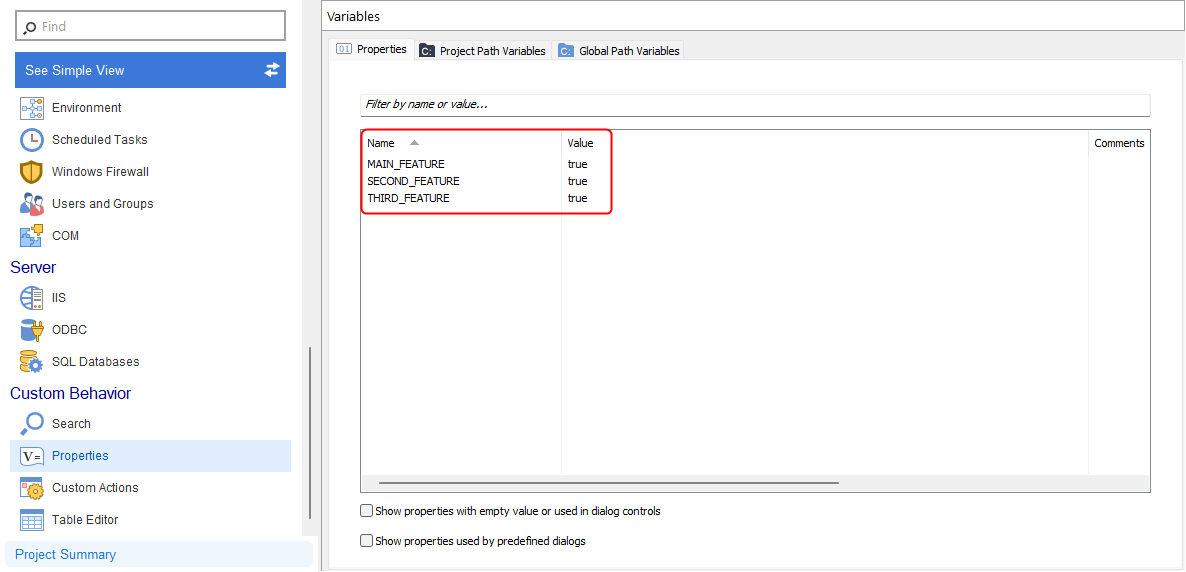
- For each feature, create a new property with a relevant name and the true value
- For this example, we'll be using:
- MAIN_FEATURE
- SECOND_FEATURE
- THIRD_FEATURE
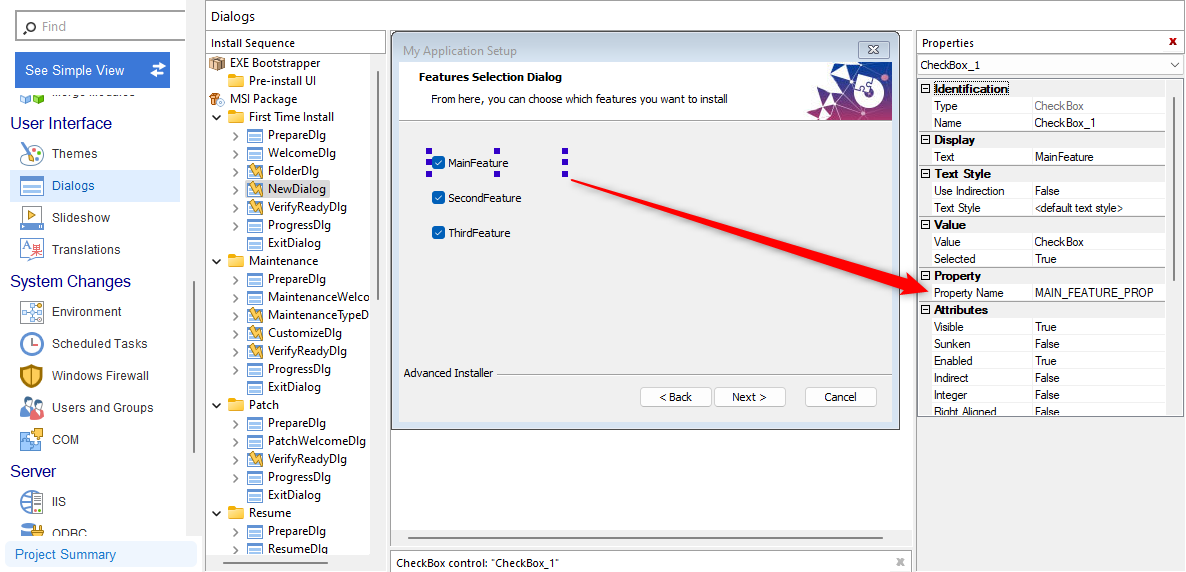
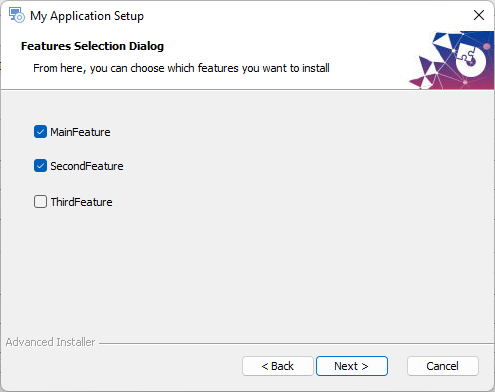
Fourth, we need to add a new dialog and a couple of checkboxes to control our features' install state. To do so, we need to:
- Go to the 'Dialogs' view
- Press on 'New Dialog' from the ribbon OR right-click on any dialog and press 'New Dialog'
- On the new dialog, we have to add a new checkbox for every feature that our project has, in our case three
- We can add a checkbox by opening the 'Control' dropdown from the ribbon and selecting the 'Check Box' item
- On the newly added checkbox, we should:
- Set a proper display value, relevant for the feature it represents; in our case, 'MainFeature'
- Set a relevant property name, one that we will use later, like 'MAIN_FEATURE_PROP' for the first one, 'SECOND_FEATURE_PROP' for the second one, and 'THIRD_FEATURE_PROP' for the third one
- Repeat the steps above for every checkbox/feature that you have
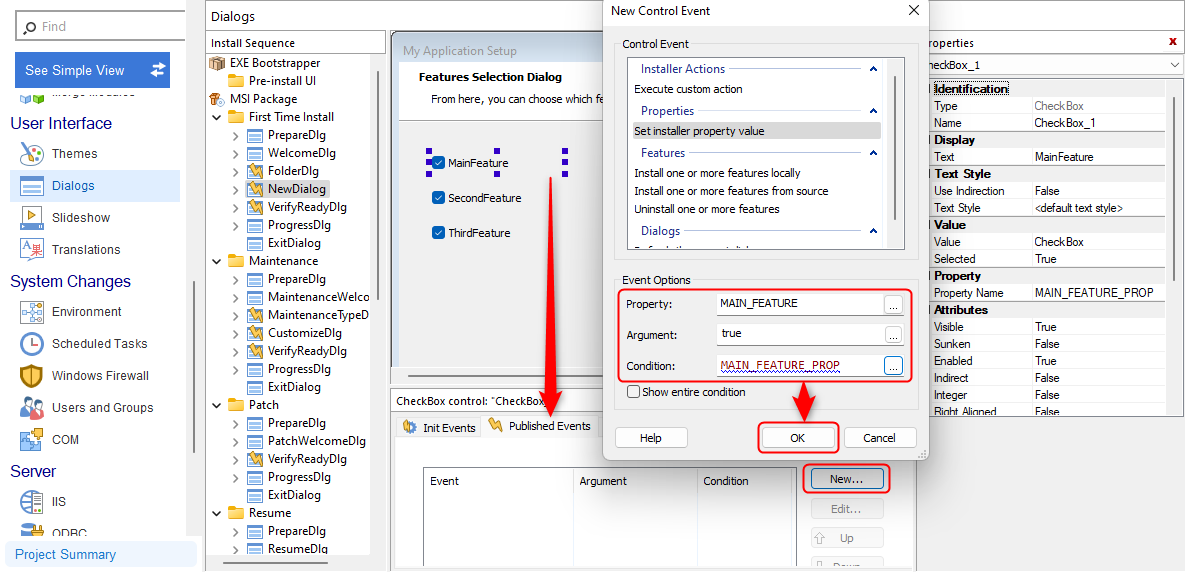
Fifth, now that we have added our checkboxes, we need to add some functionality for remembering the checkboxes' state using the properties that we have defined in the third step. To do so, we need to:
- Click on a checkbox
- Go to 'Published Events' tab in the section below
- Press on 'New...' button
- Choose 'Set installer property value' from the presented list
- In the 'Property' field, enter the name of the coresponding property; in our case, 'MAIN_FEATURE'
- In the 'Argument' field, enter the value 'true'
- In the 'Condition' field, enter 'MAIN_FEATURE_PROP' (the name of the property associated with the checkbox)
- Press OK
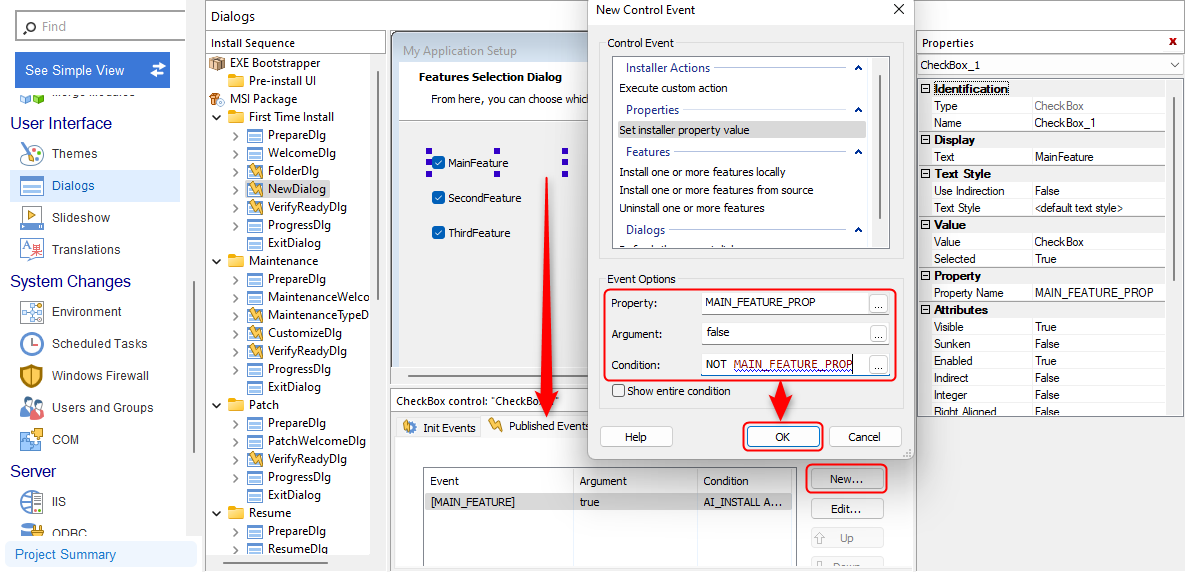
Add first published event - Press again on 'New...' button
- Choose 'Set installer property value' from the presented list
- In the 'Property' field, enter the name of the coresponding property; in our case, 'MAIN_FEATURE'
- In the 'Argument' field, enter the value 'false'
- In the 'Condition' field, enter 'NOT MAIN_FEATURE_PROP' (the name of the property associated with the checkbox preceded by the 'NOT' argument)
- Press OK
Add second published event - Repeat steps 1-12 for each checkbox, obviously changing the name of the property according to each checkbox/feature
- These two published events will track the state of each checkbox and store true or false in the properties defined in the third step
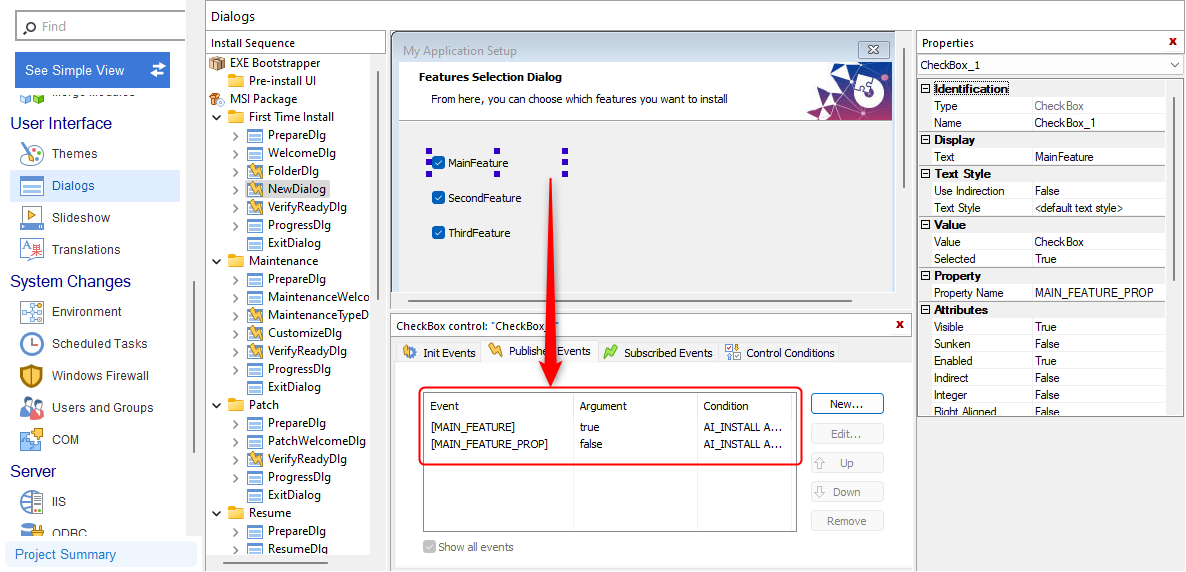
Added both published events
![]() Please note that once you have unchecked a checkbox, Advanced Installer deletes the property altogether, thus you will see an empty space if you try to retrieve its property's value. The fifth step is necessary in order to display true or false for each feature in Installer Analytics. If you don't need these 'custom' values, you can simply skip this step.
Please note that once you have unchecked a checkbox, Advanced Installer deletes the property altogether, thus you will see an empty space if you try to retrieve its property's value. The fifth step is necessary in order to display true or false for each feature in Installer Analytics. If you don't need these 'custom' values, you can simply skip this step.
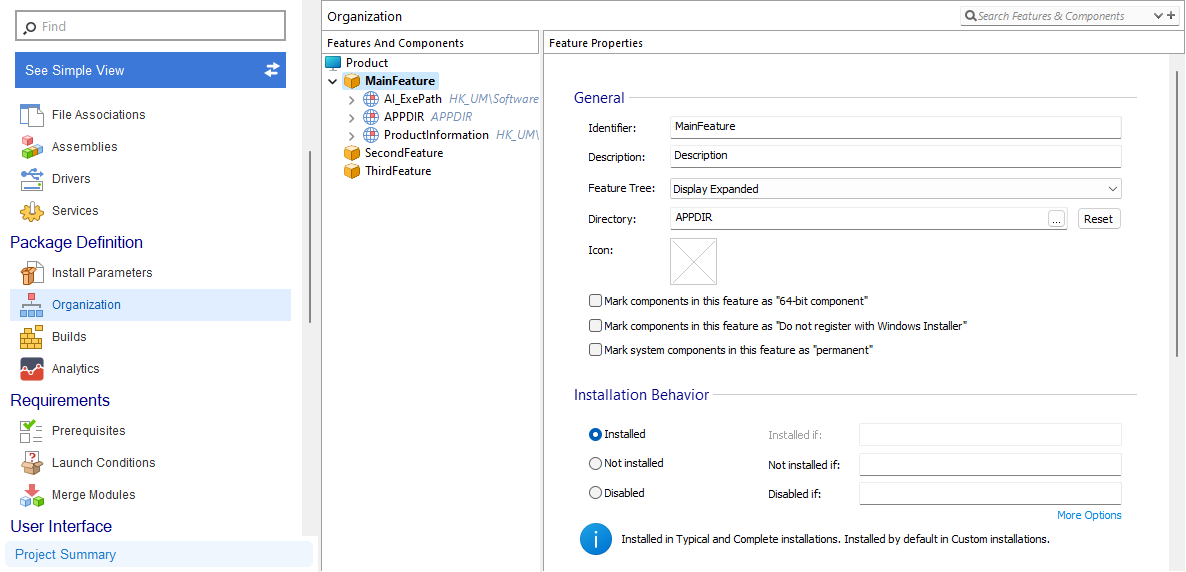
Sixth, we need to condition our features to follow the state of the checkboxes. In other words, if we have a checkbox checked, its corresponding feature will be installed. If the checkbox is unchecked, the feature will not be installed. To do so, we need to:
- Go to the 'Organization' view
- Click on each feature
- In the 'Feature Properties' window presented in the right side, under the 'Installation Behavior' section, add 'NOT' and the name of the corresponding checkbox's property in the 'Not installed if:' field; in our case, for the first feature, the condition will be 'NOT MAIN_FEATURE_PROP'
- For the other two features, the conditions will be 'NOT SECOND_FEATURE_PROP' and 'NOT THIRD_FEATURE_PROP'
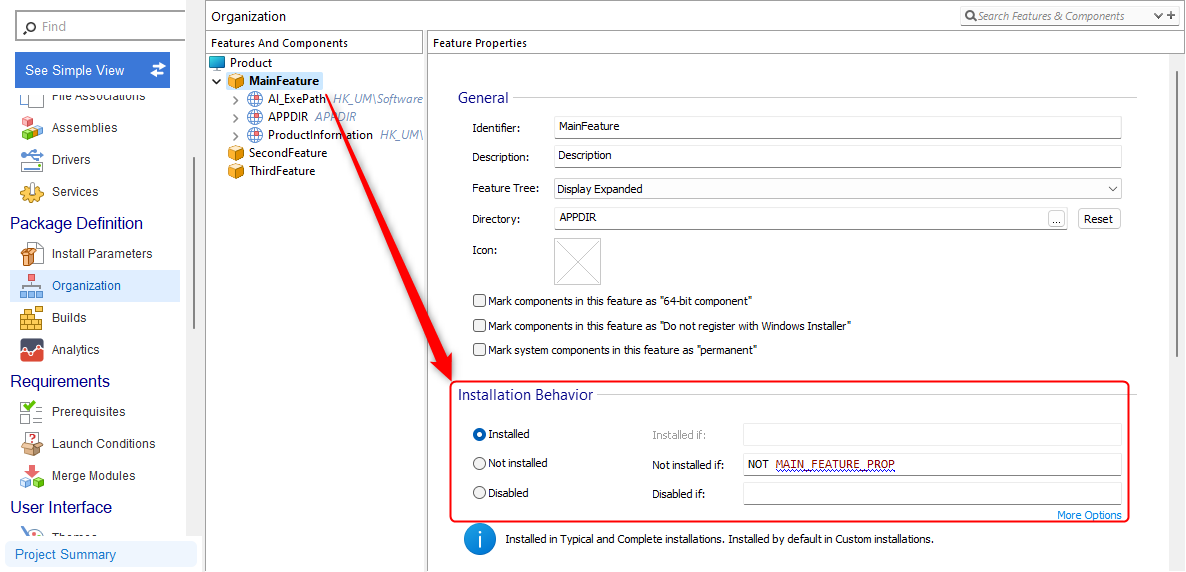
Added feature install condition
Seventh, we'll need to enable the Installer Analytics tracking for that project. If you're unfamiliar with this step, you can follow this link to guide you step by step.
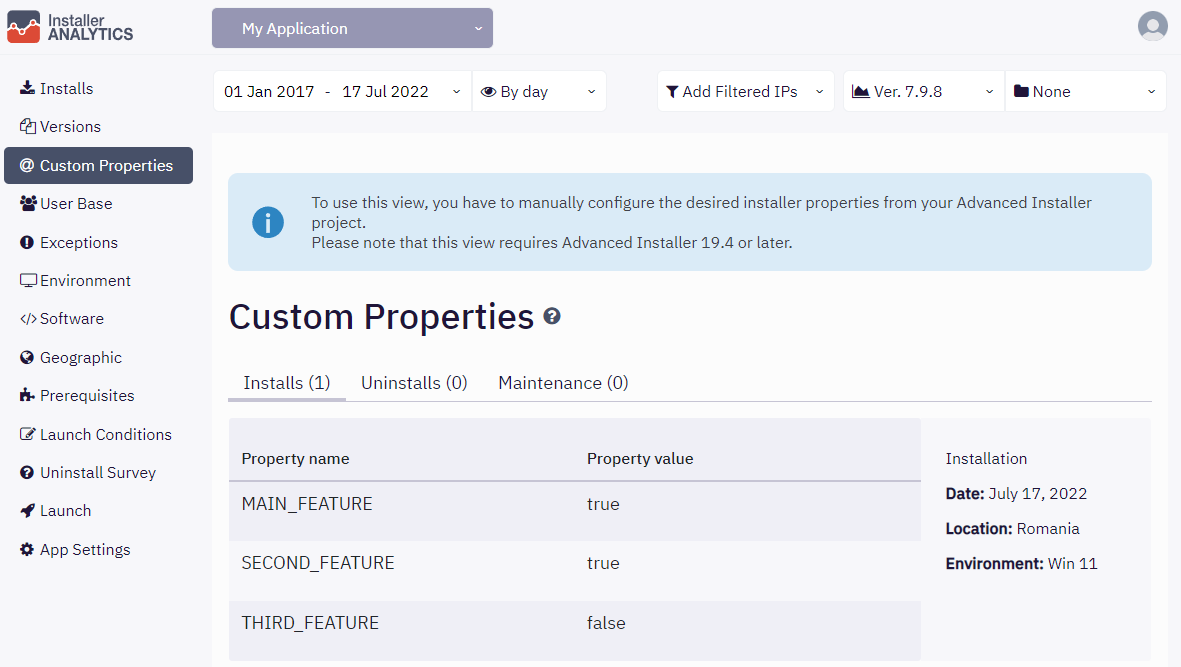
Eigth, and this is the most crucial part, we need to add the properties from the third step into the Installer Analytics view of your project. To do so, we need to:
- Navigate to the Installer Analytics view from your Advanced Installer project
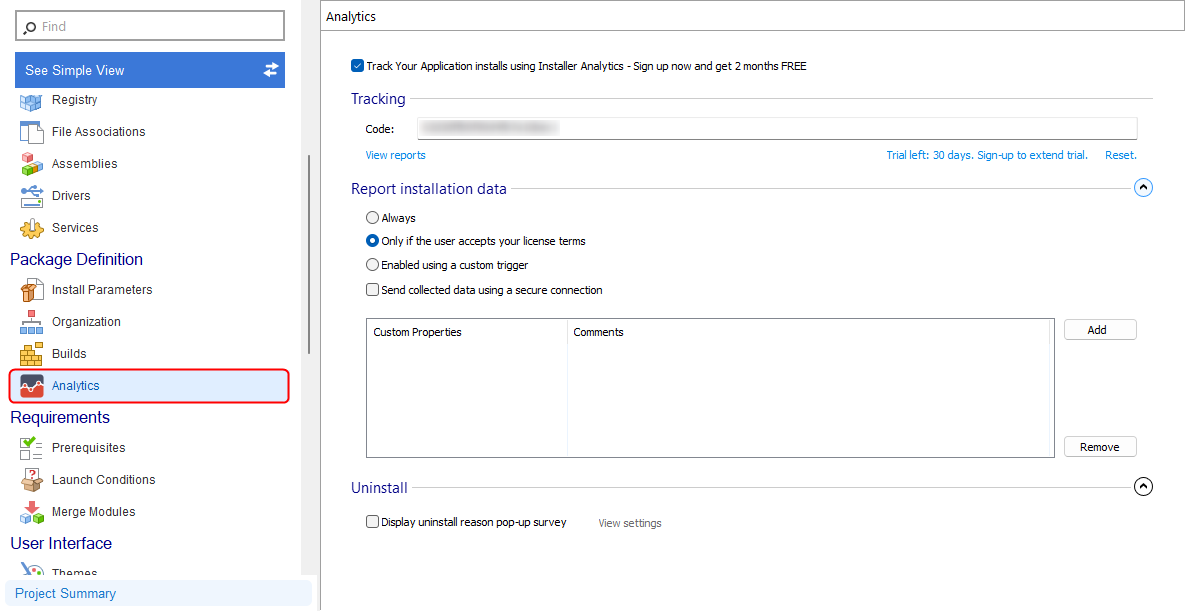
Installer Analytics View - In the 'Report Installation Data', you'll see the Custom Properties table

Custom Properties Table - Press 'Add' in order to open the 'Select a Property' picker
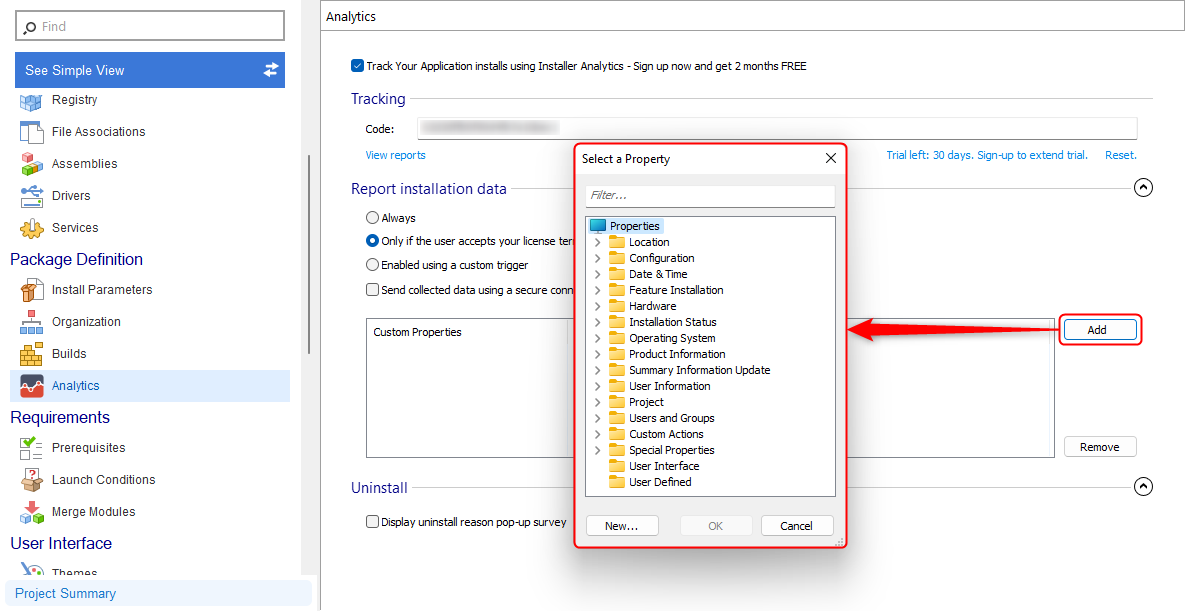
Select a Property picker - Enter 'MAIN_FEATURE' and press 'OK'
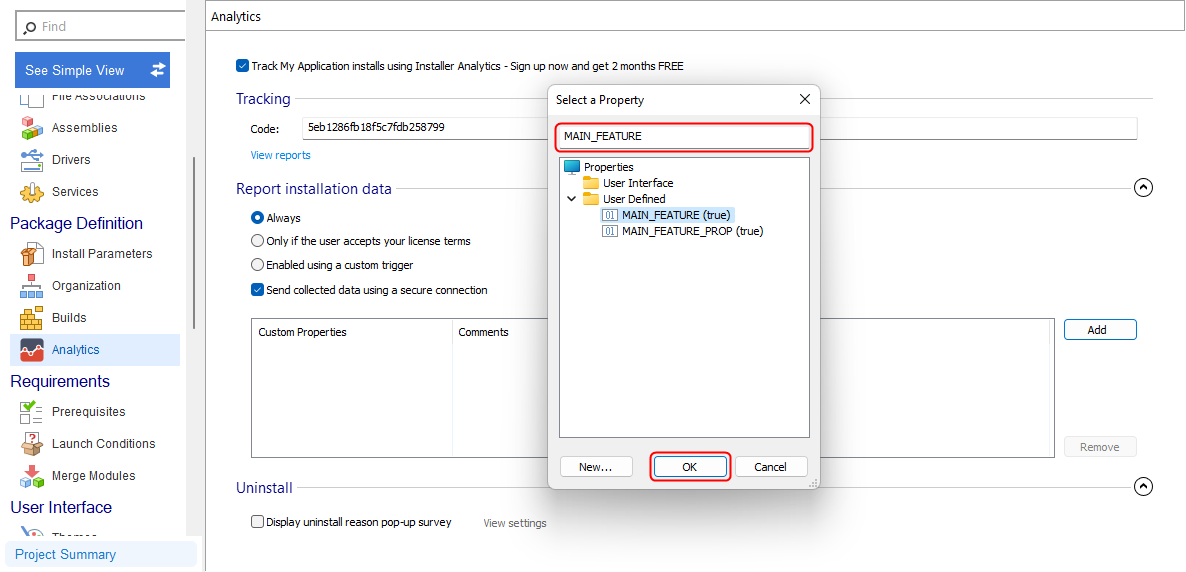
MAIN_FEATURE property - Repeat the steps above for 'SECOND_FEATURE' and 'THIRD_FEATURE'
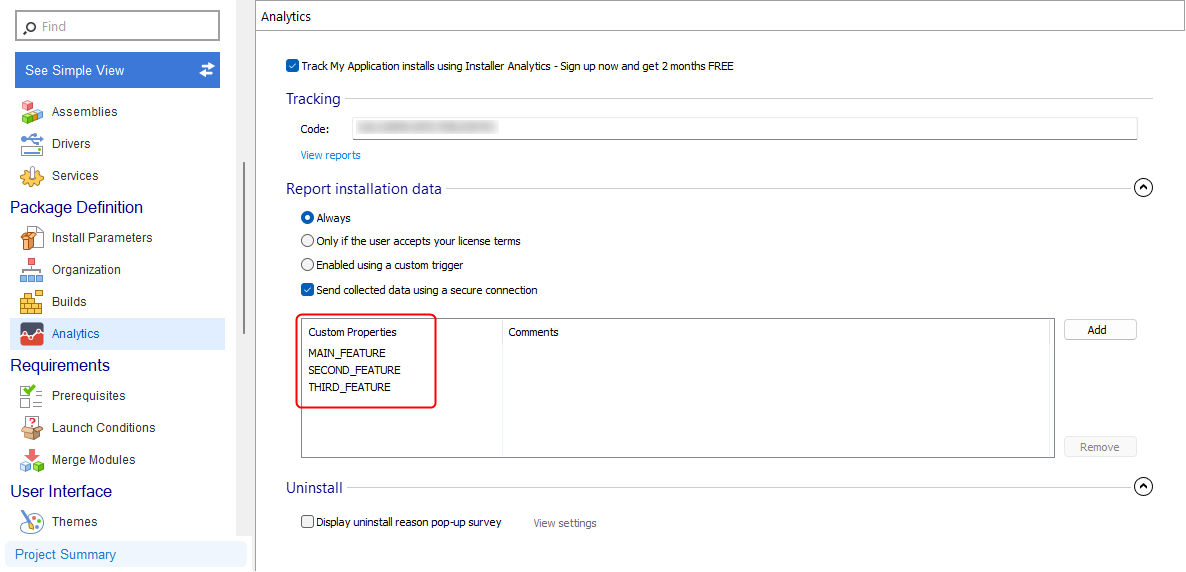
Added Features for tracking
Last, we need to save, build the project, and finally release the installer to your customers. Once these have been done, your clients will start installing your product, and Installer Analytics WebApp will show the tracking data.
Note: You can also test the tracking yourself before releasing it to ensure that everything was configured correctly. If you plan to do so, please use the Only Filtered IPs option, as your IP might be already placed in the exclusion list from the App Settings view in the 'IP Filter' section.