Custom Properties - Tracking the state of a checkbox
On this page, we're going to learn how to set up the tracking of your installer's checkbox(es) state using Installer Analytics.
First, we'll need an Advanced Installer project. You can open your existing project or create a new one. You can always follow a tutorial like this one if you're new to Advanced Installer.
Second, we need to identify the checkbox that we want to track. Let's say that we want to track if the users who install the application choose to associate your application with specific file extensions.
- We need to go to the 'Files and Folders' view and make sure to have our application's executable file added (in case of a new project)
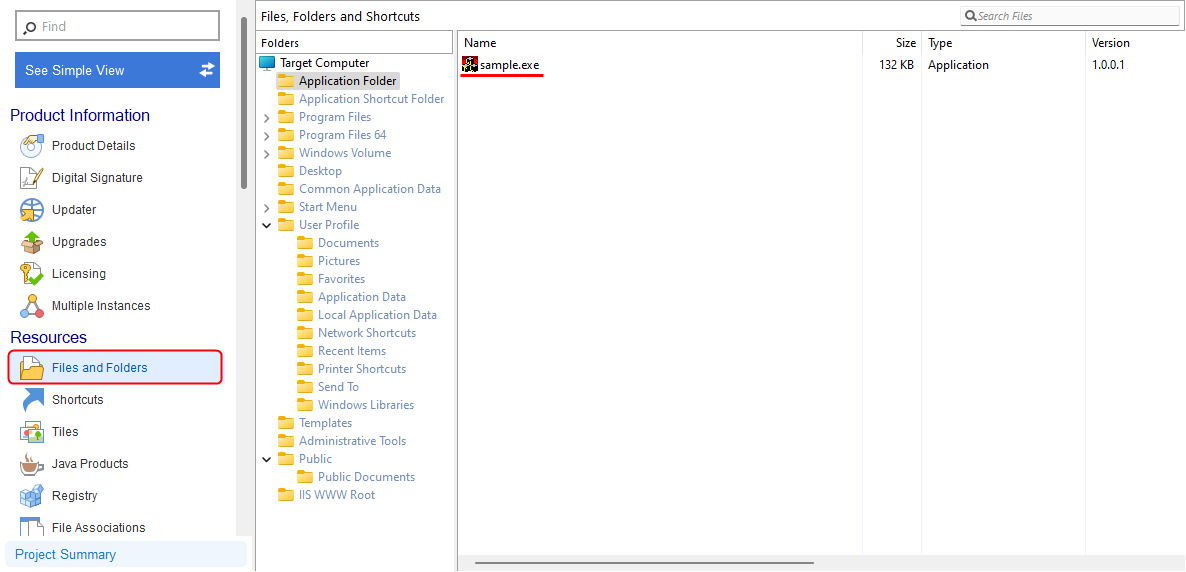
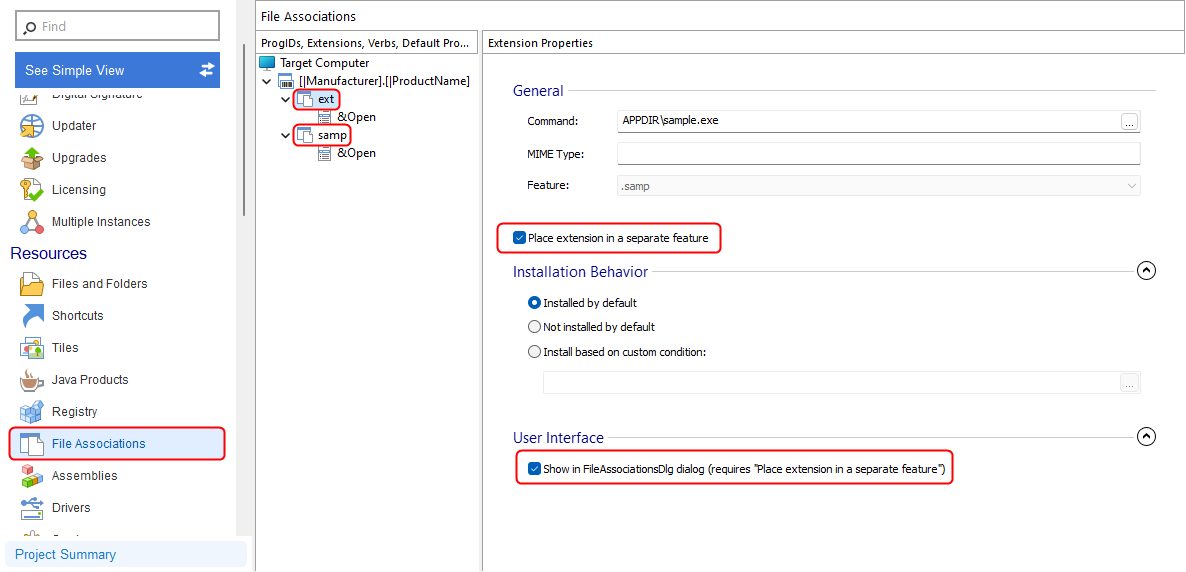
Files and Folders View with EXE - We need to go to the 'File Associations' view and add the extensions that our application supports; in our case, we'll use .ext and .samp

File Associations View - We need to go to check the "Place extension in a separate feature" checkbox and enable the "Show in FileAssociationsDlg dialog" for both extensions to add them to a predefined dialog automatically
Configured File Associations View - We need to go to the 'Dialogs' view and select the 'FileAssociationsDlg' dialog
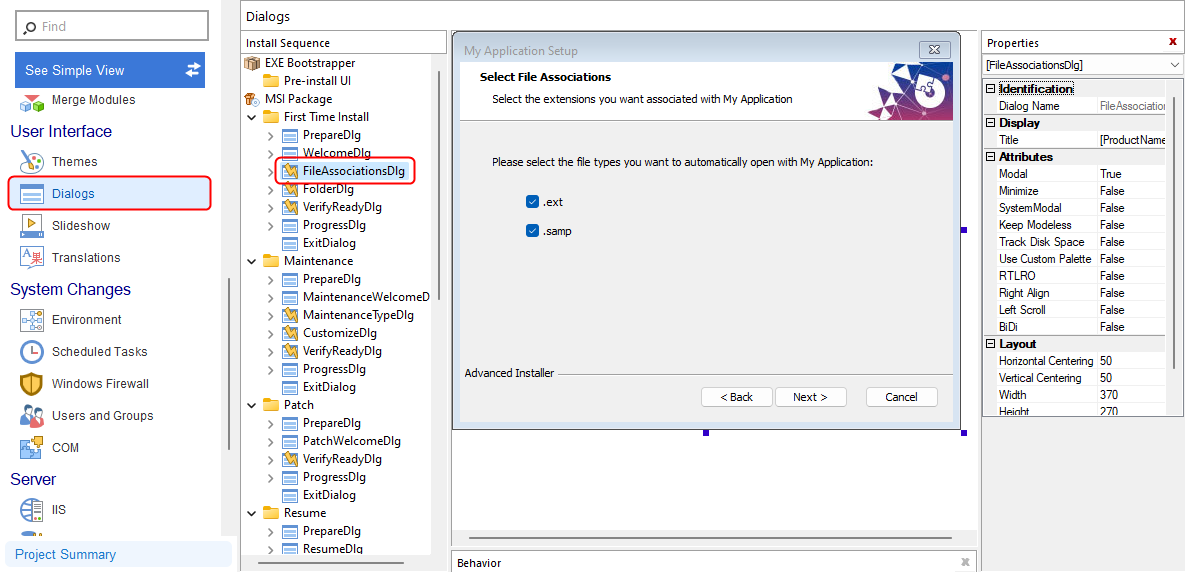
Dialogs View - We need to click on each of the checkboxes in order to identify their associated properties; in our case, the checkboxes are linked to the EXT_CHECKBOX and SAMP_CHECKBOX properties
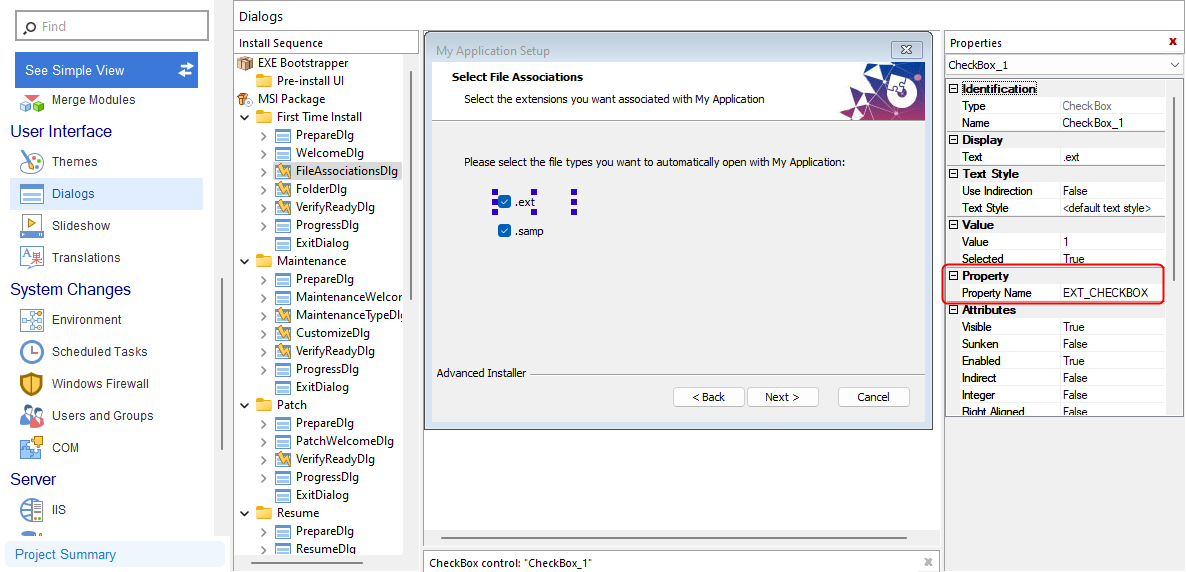
Dialogs View - .ext Checkbox Property 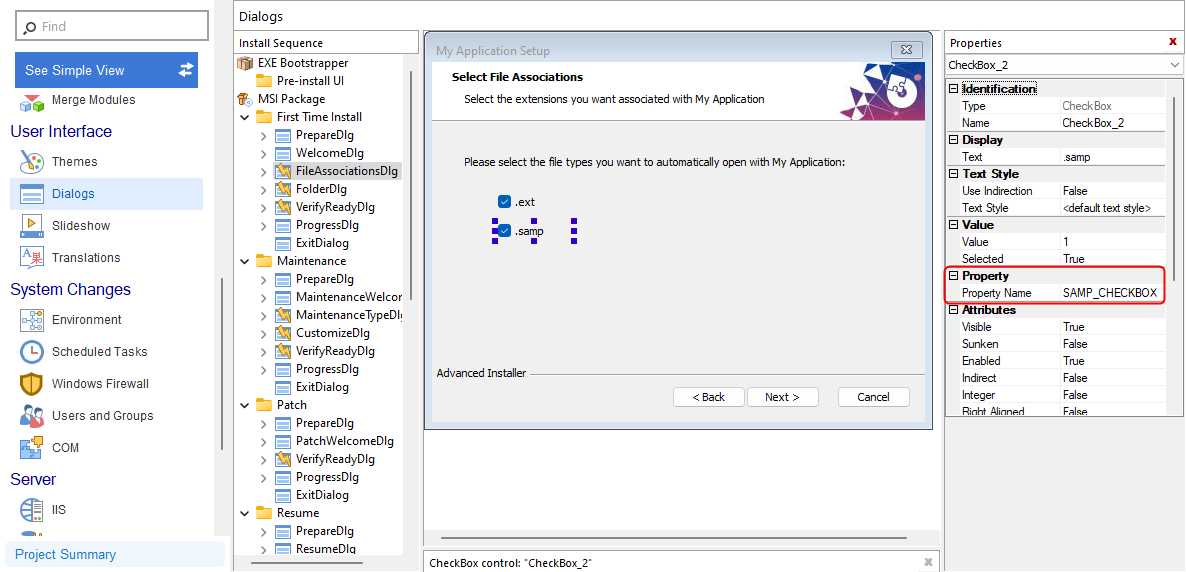
Dialogs View - .samp Checkbox Property
Third, we'll need to enable the Installer Analytics tracking for that project. If you're unfamiliar with this step, you can follow this link to guide you step by step.
Fourth, and this is the most crucial part, we need to add the properties associated with the checkboxes into the Installer Analytics view of our project. In our case, the properties are EXT_CHECKBOX and SAMP_CHECKBOX. To do so, we need to:
- Navigate to the Installer Analytics view from your Advanced Installer project
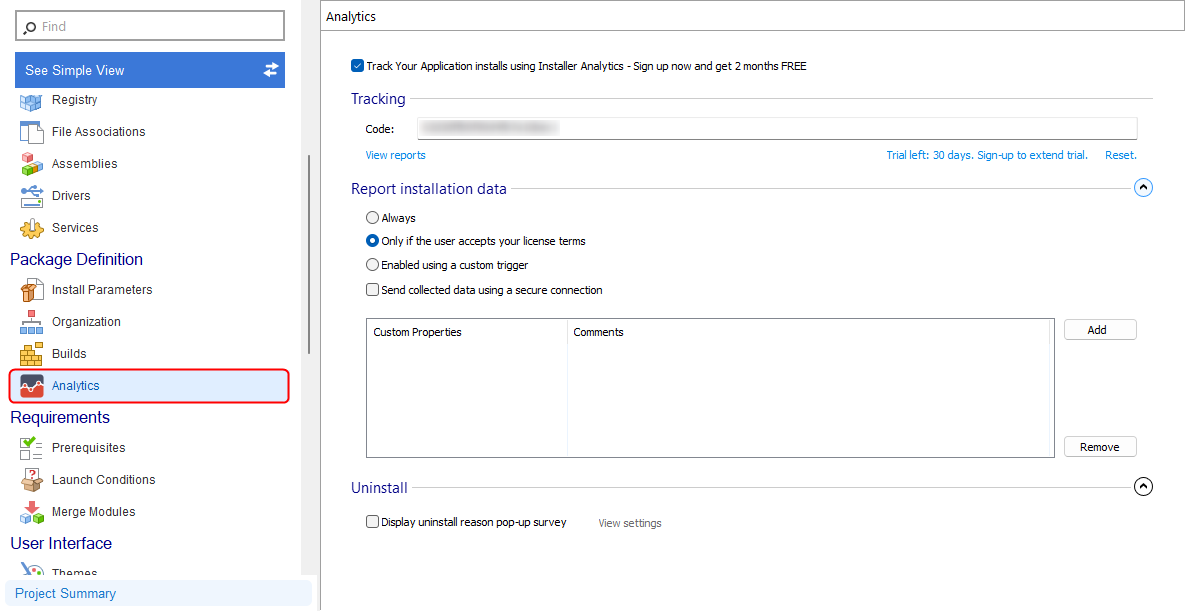
Installer Analytics View - In the 'Report Installation Data' section, you'll see the Custom Properties table

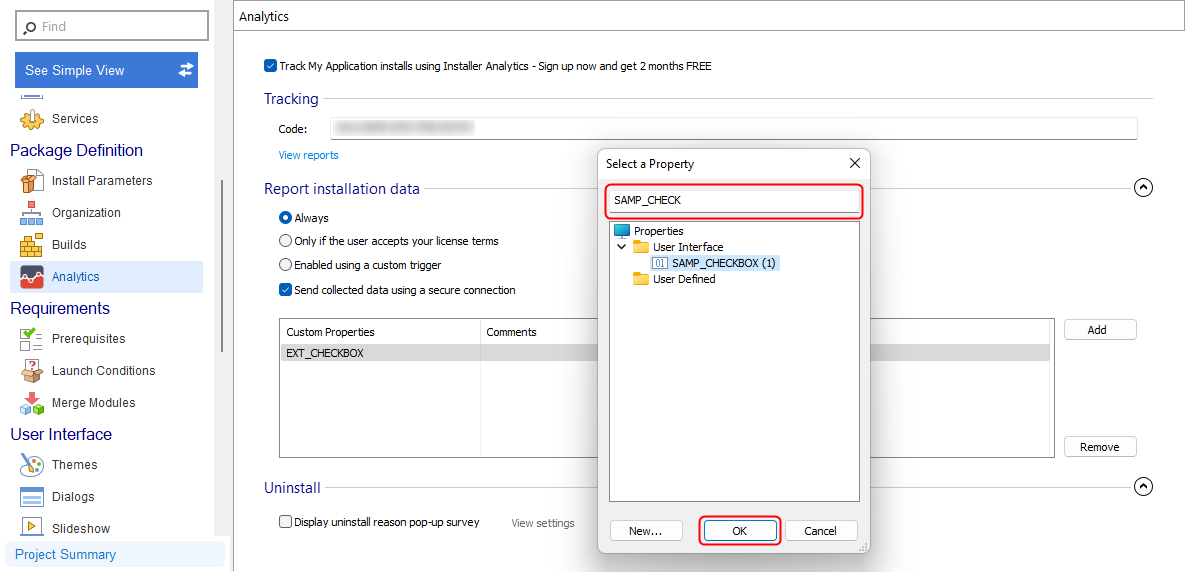
Custom Properties Table - Press 'Add' in order to open the 'Select a Property' picker
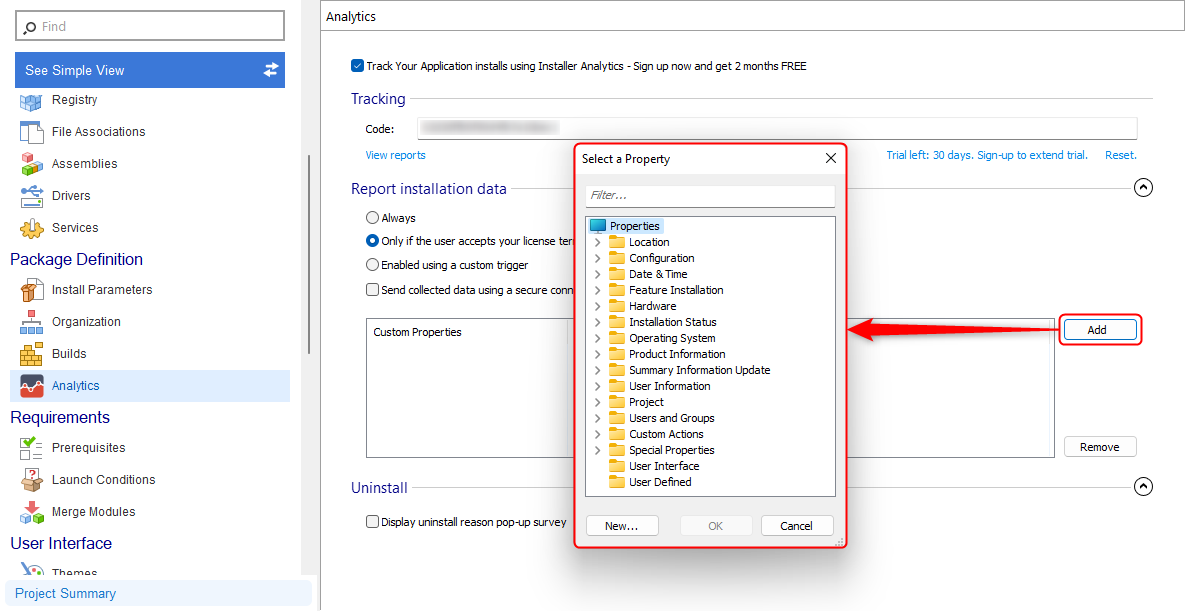
Select a Property picker - Enter 'EXT_CHECKBOX' and press 'OK'
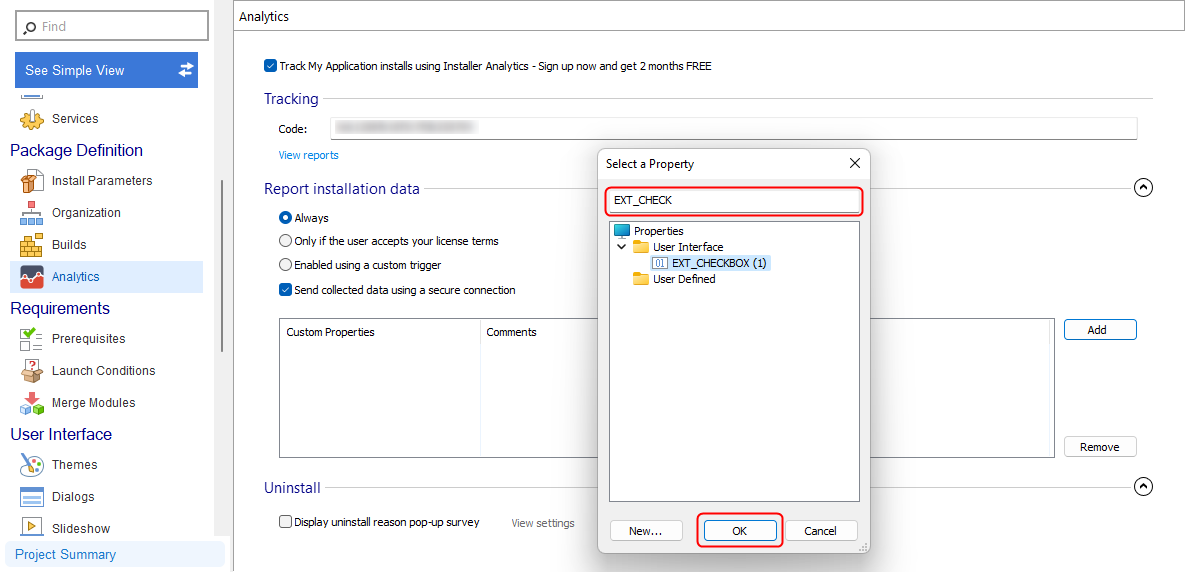
EXT_CHECKBOX property - Enter 'SAMP_CHECKBOX' and press 'OK'
SAMP_CHECKBOX property - When installing, it should look like this
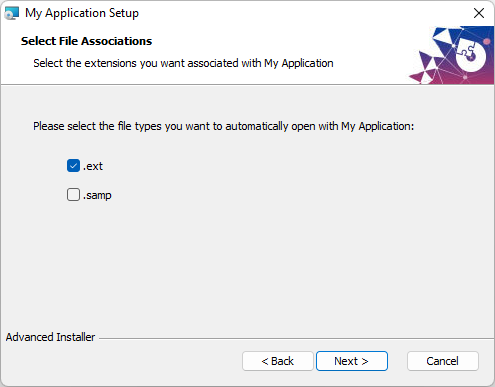
EXT_CHECKBOX and SAMP_CHECKBOX checkboxes in Installer
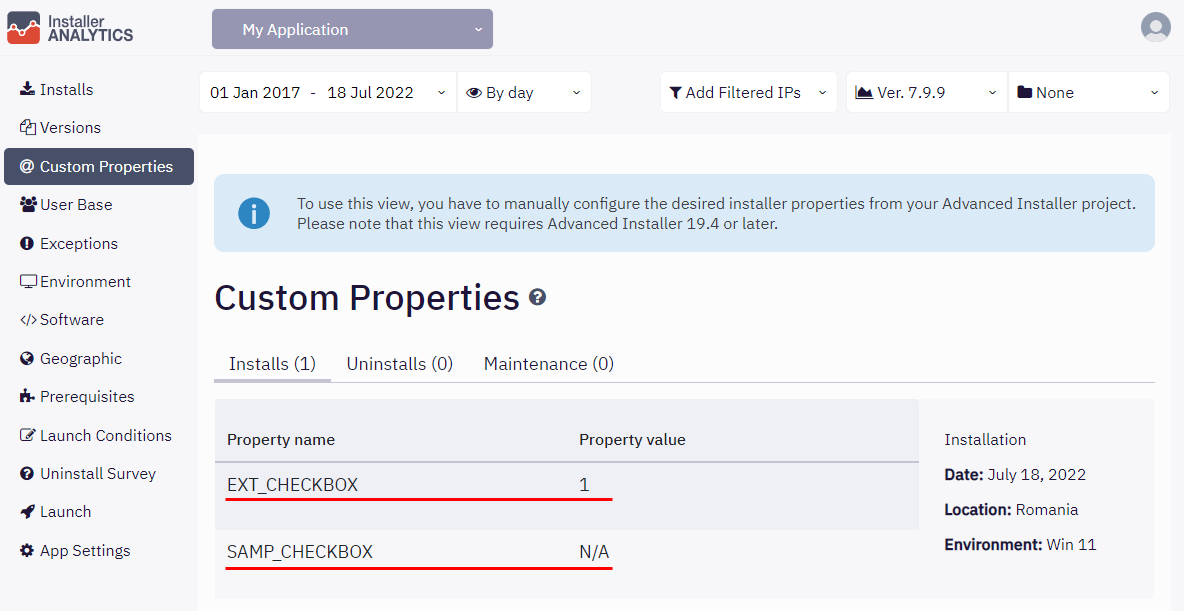
Fourth, we need to save, build the project, and finally release the installer to your customers. Once these have been done, your clients will start installing your product, and Installer Analytics WebApp will show the tracking data.
Note: You can also test the tracking yourself before releasing it to ensure that everything was configured correctly. If you plan to do so, please use the Only Filtered IPs option, as your IP might be already placed in the exclusion list from the App Settings view in the 'IP Filter' section.
![]() Please note that you can use this method for any checkbox, be it an Advanced Installer predefined one or any other custom added checkbox. As long as you identify its associated property, you can track it using the method above.
Please note that you can use this method for any checkbox, be it an Advanced Installer predefined one or any other custom added checkbox. As long as you identify its associated property, you can track it using the method above.
![]() Please also note that VIEWREADME and RUNAPPLICATION predefined properties cannot be tracked at the moment since the values of the defined tracked properties are reported before their value is known. If you need such a feature, please get in touch with us.
Please also note that VIEWREADME and RUNAPPLICATION predefined properties cannot be tracked at the moment since the values of the defined tracked properties are reported before their value is known. If you need such a feature, please get in touch with us.